¶ What is Omni Channel CX
Omni-channel customer experience (CX) is a way of interacting with customers across different platforms such as in-store, online, mobile, social media, and phone. The goal is to make the customer experience consistent and personalized no matter where they are interacting with the company. It's like if a customer starts a conversation with a company on their website and then continues it on their mobile app and then finish it at a store, it should feel like one continuous conversation for the customer, not separate interactions. This way, customers will feel like the company knows them and their needs and is easy to interact with.
¶ Omni Channel CX Inbox
An Inbox connects your website, or social media accounts like Facebook, Twitter, or chat platforms like WhatsApp, Line, and more with QVOICE CX.
You can have unlimited inboxes in your QVOICE CX account.
Navigate to QVOICE Portal
- Click on Contact Center
- Click on Omni Channel → Inboxes

¶ Start adding inboxes
Once you reach the inbox screen, click on the button: “Add Inbox” which you will find at the top right hand corner of the page.
Start selecting channels. You can see the list of supported channels on this screen. Eg: Website, Facebook, Twitter, WhatsApp, SMS, Email, API, Telegram, Line, etc.

Inboxes would be connected to the front end Widgets placed in Website or other channels. Related: Setting up Widget.
¶ Create a new Omni Channel CX Inbox
¶ Inbox settings
Your freshly configured WebChat inbox should now appear in your list of inboxes. To see this and to make additional settings in your WebChat inbox, go to Settings → Inboxes →

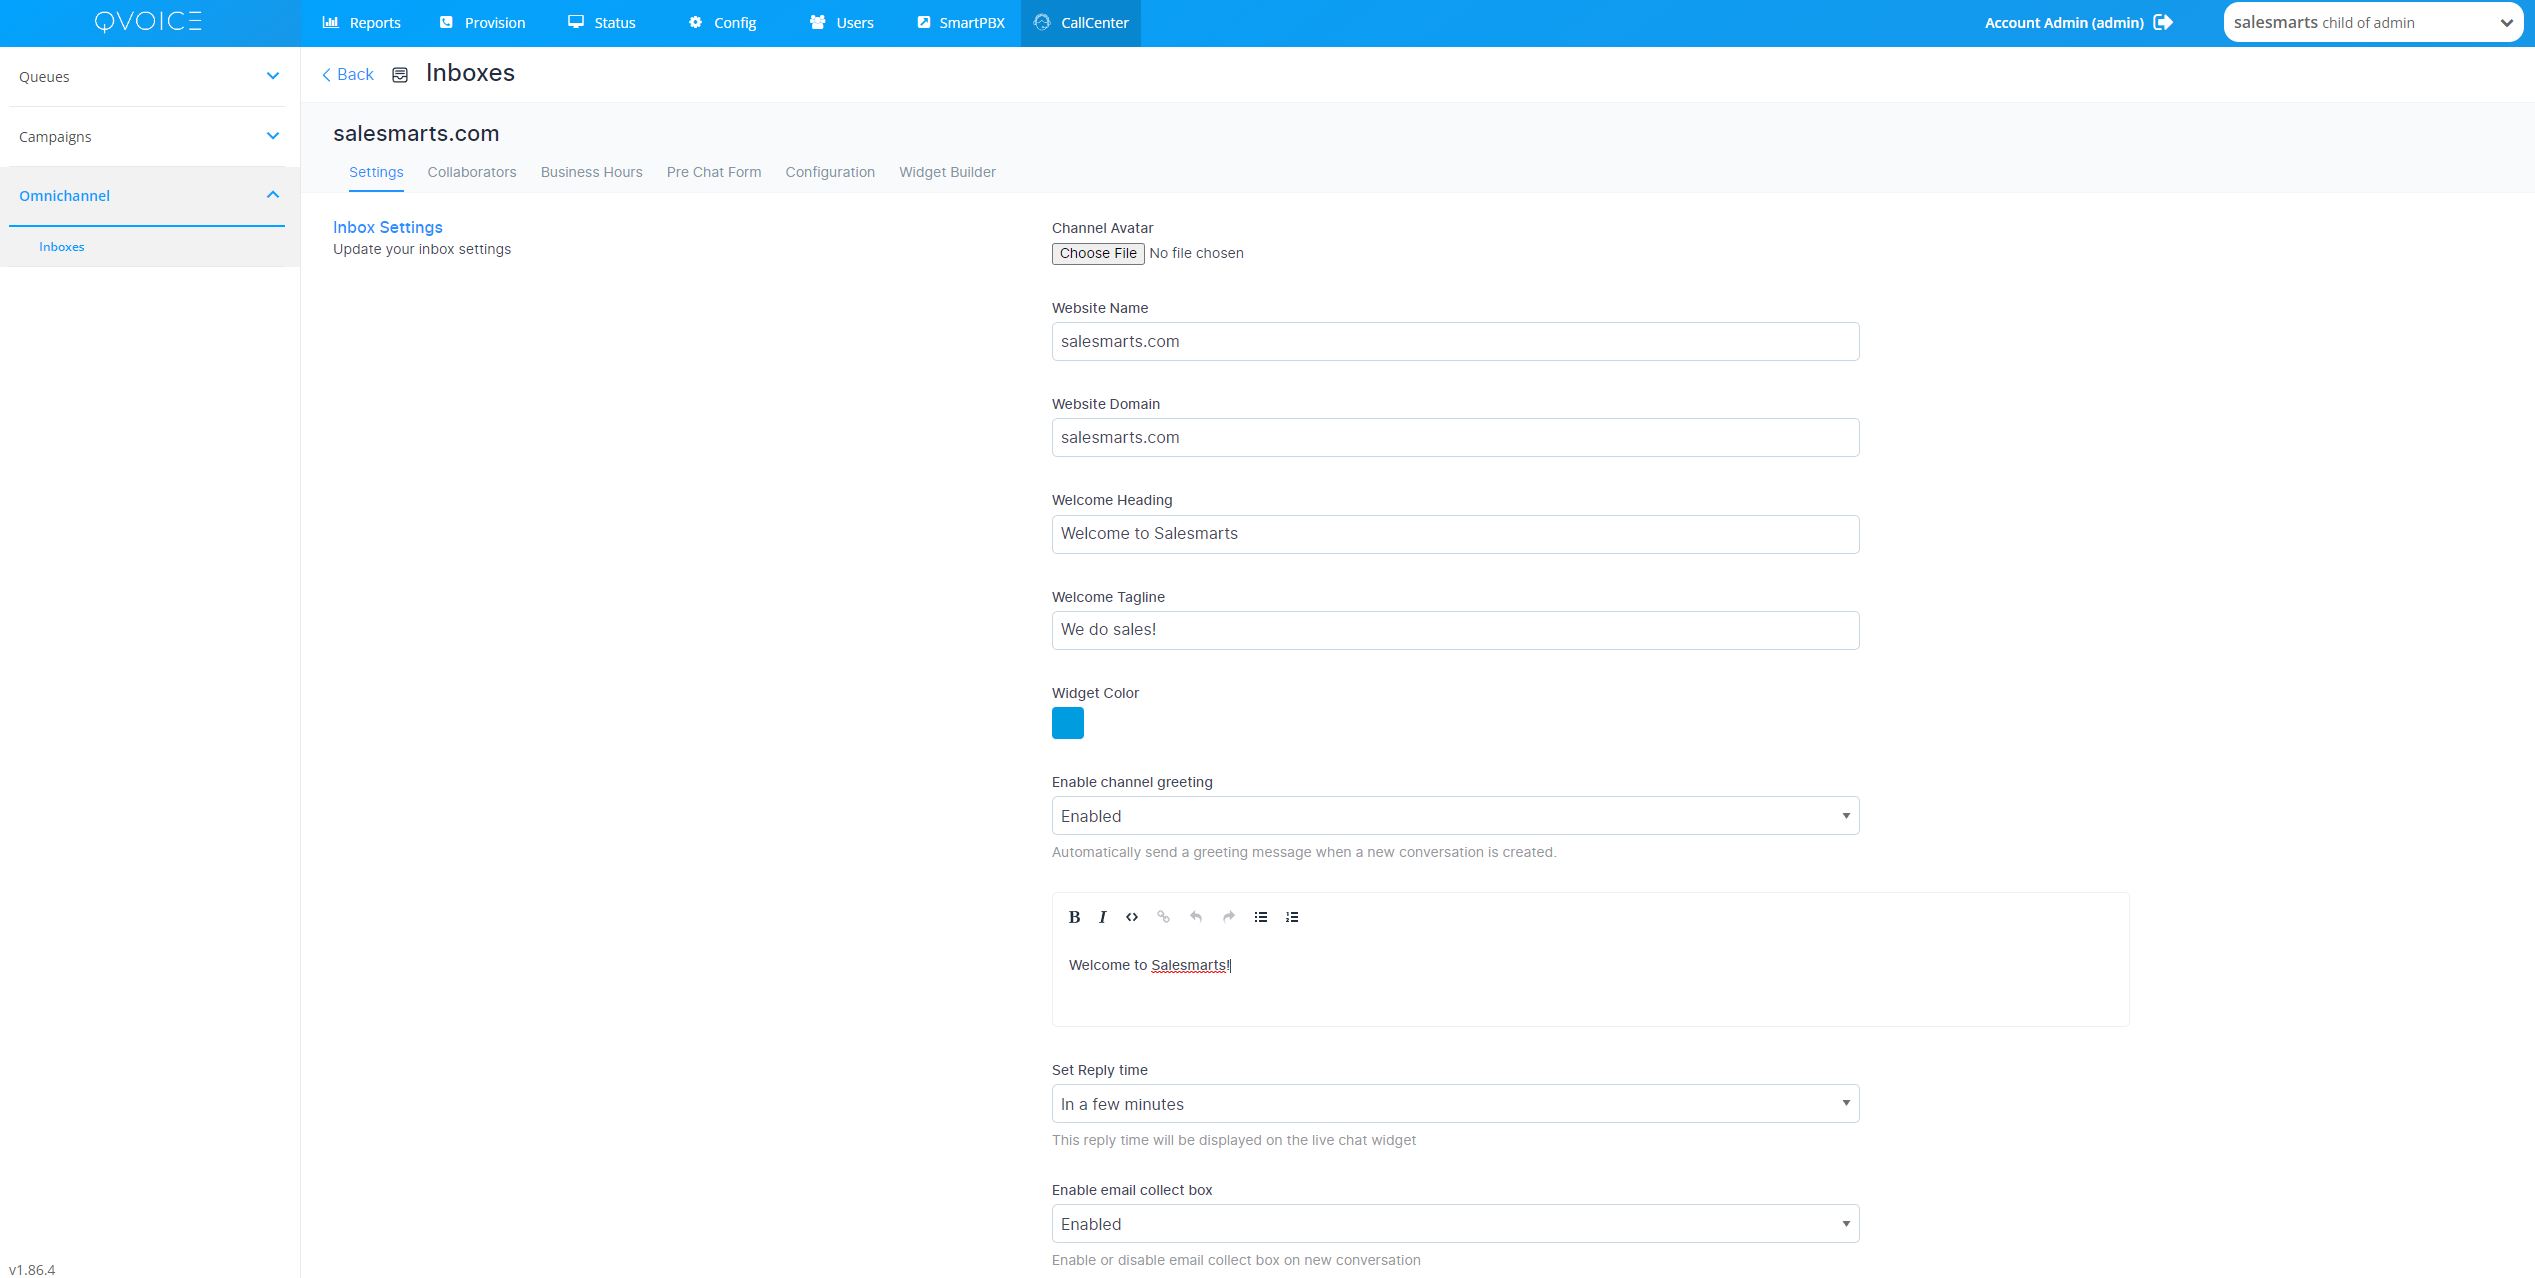
Click the gear icon on the associated Web Chat inbox. You will see the following screen:

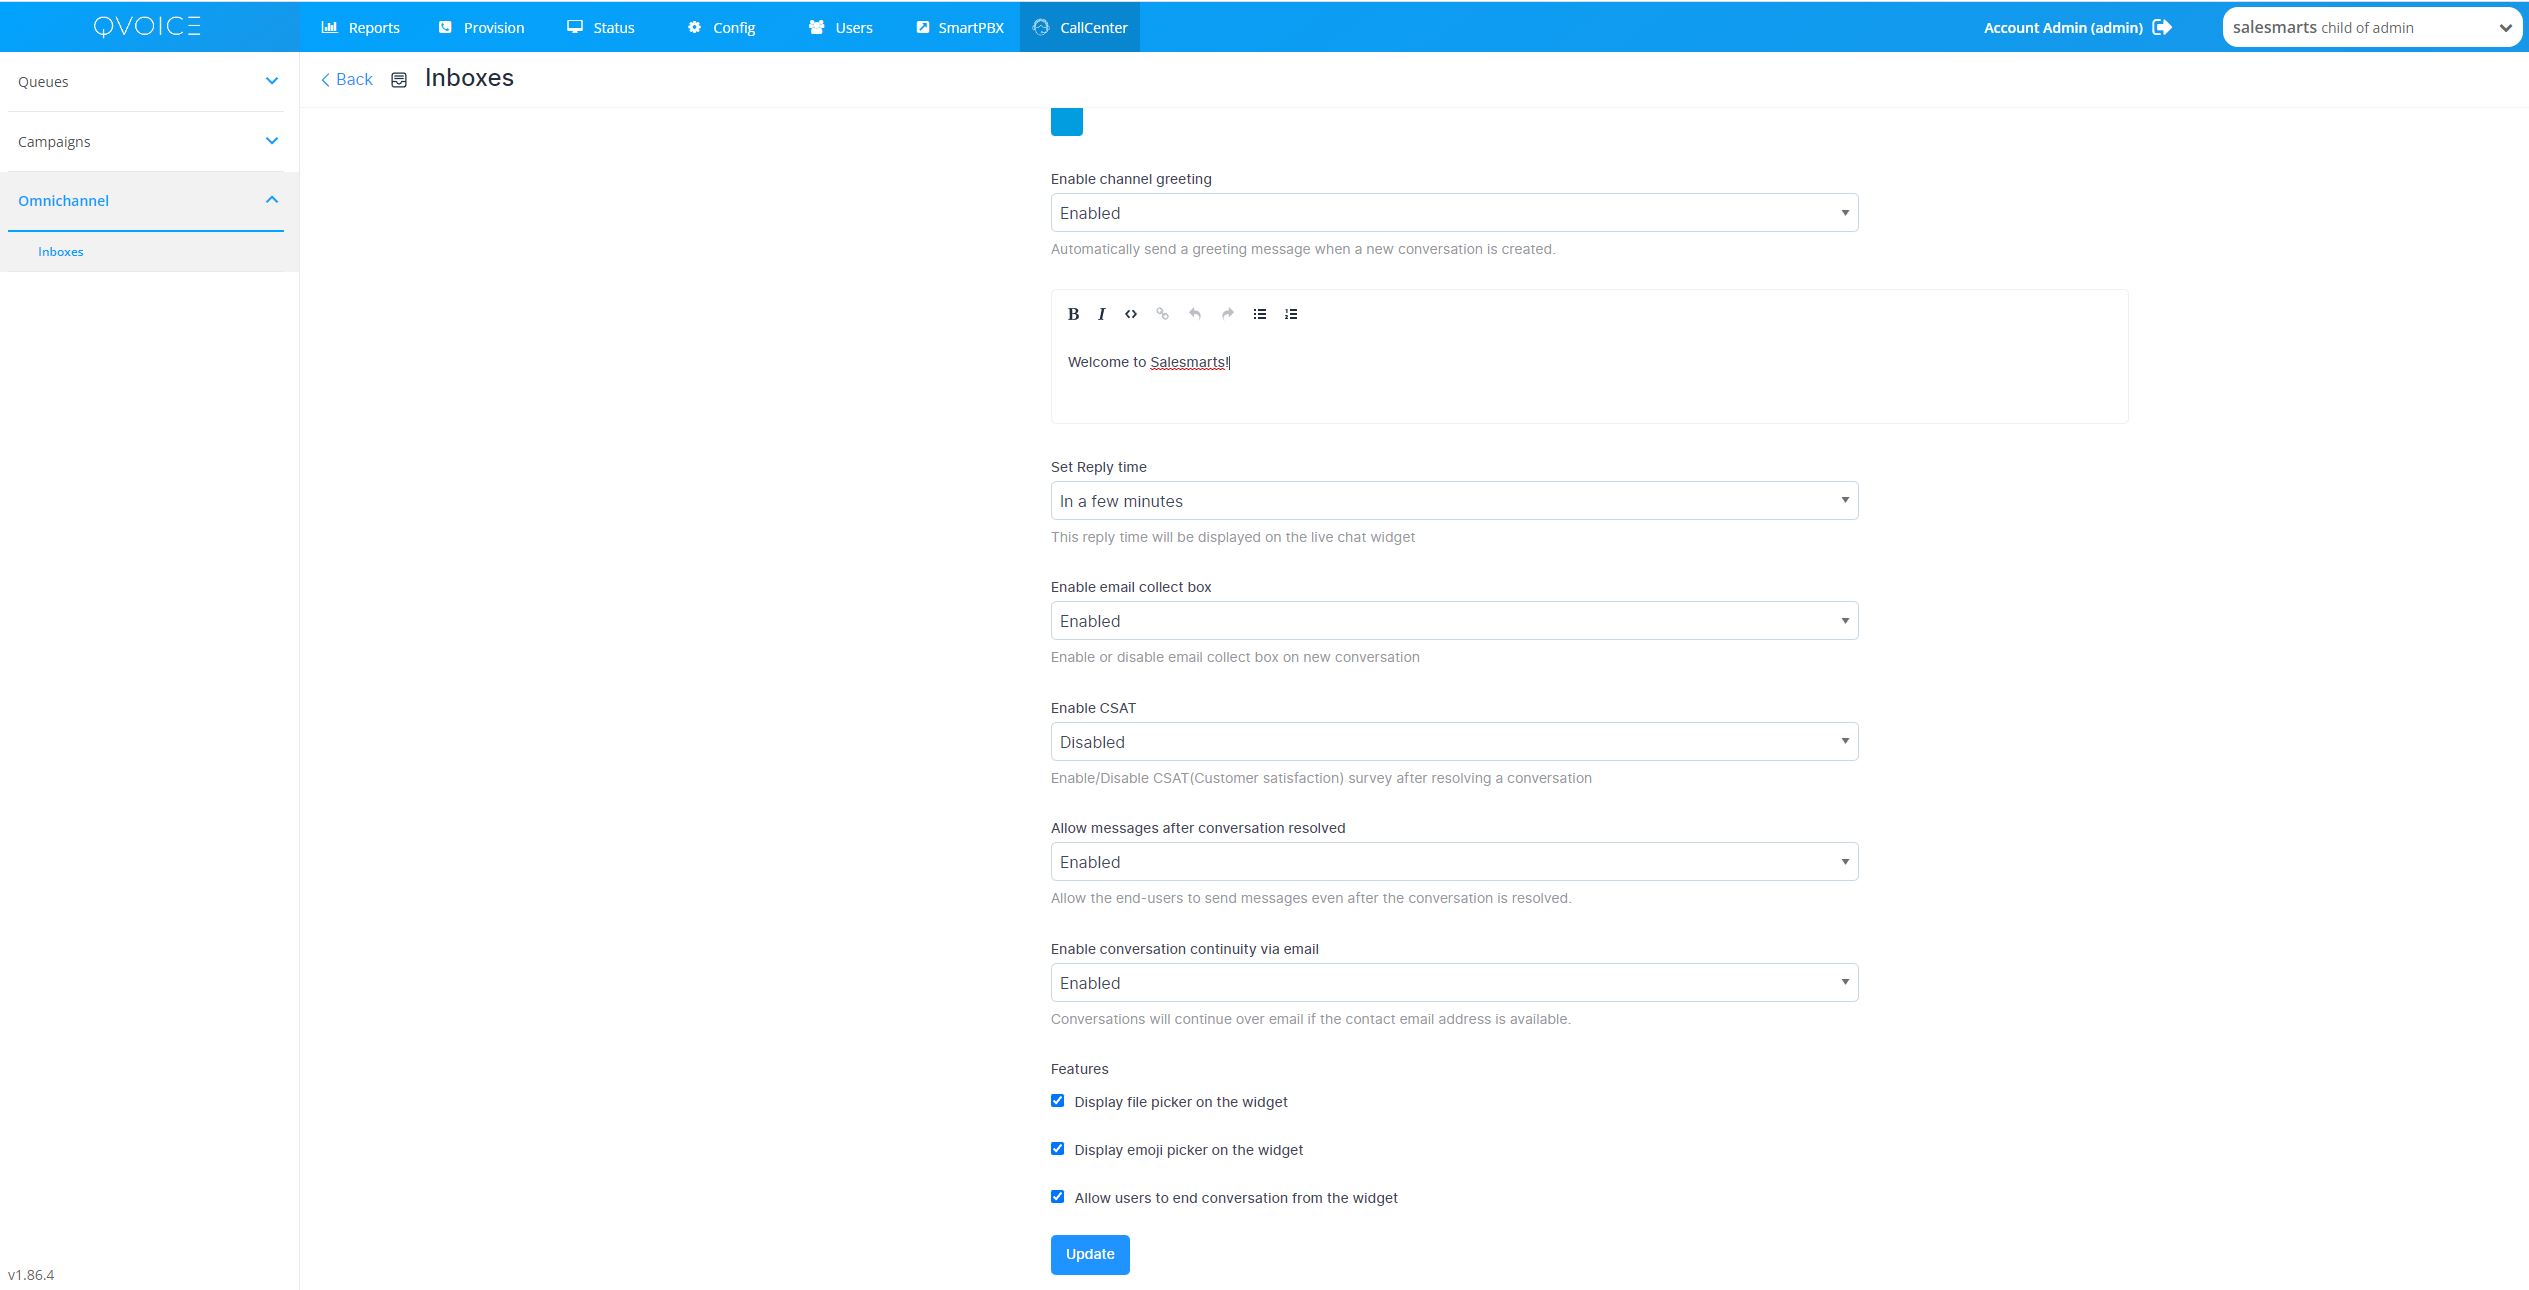
You can make some basic changes here.
Settings tab
Enable channel greeting. Once you enable this, QVOICE CX will send a greeting message to new conversations created through your WebChat inbox.
Enable CSAT. Once you enable this, your Customer Satisfaction survey will be launched every time a ticket is resolved. The CSAT results can be viewed later in the Reports section.

Collaborators tab
Click on the Collaborators tab. Here, you can add Agents to the Inbox or delete Agents who have been already added in the Inbox by linking or unlinking the Queues to the CX inbox.
Agent assignment will follow the Queue hunt configuration settings.

Click on Update to save the changes.
Business Hours tab
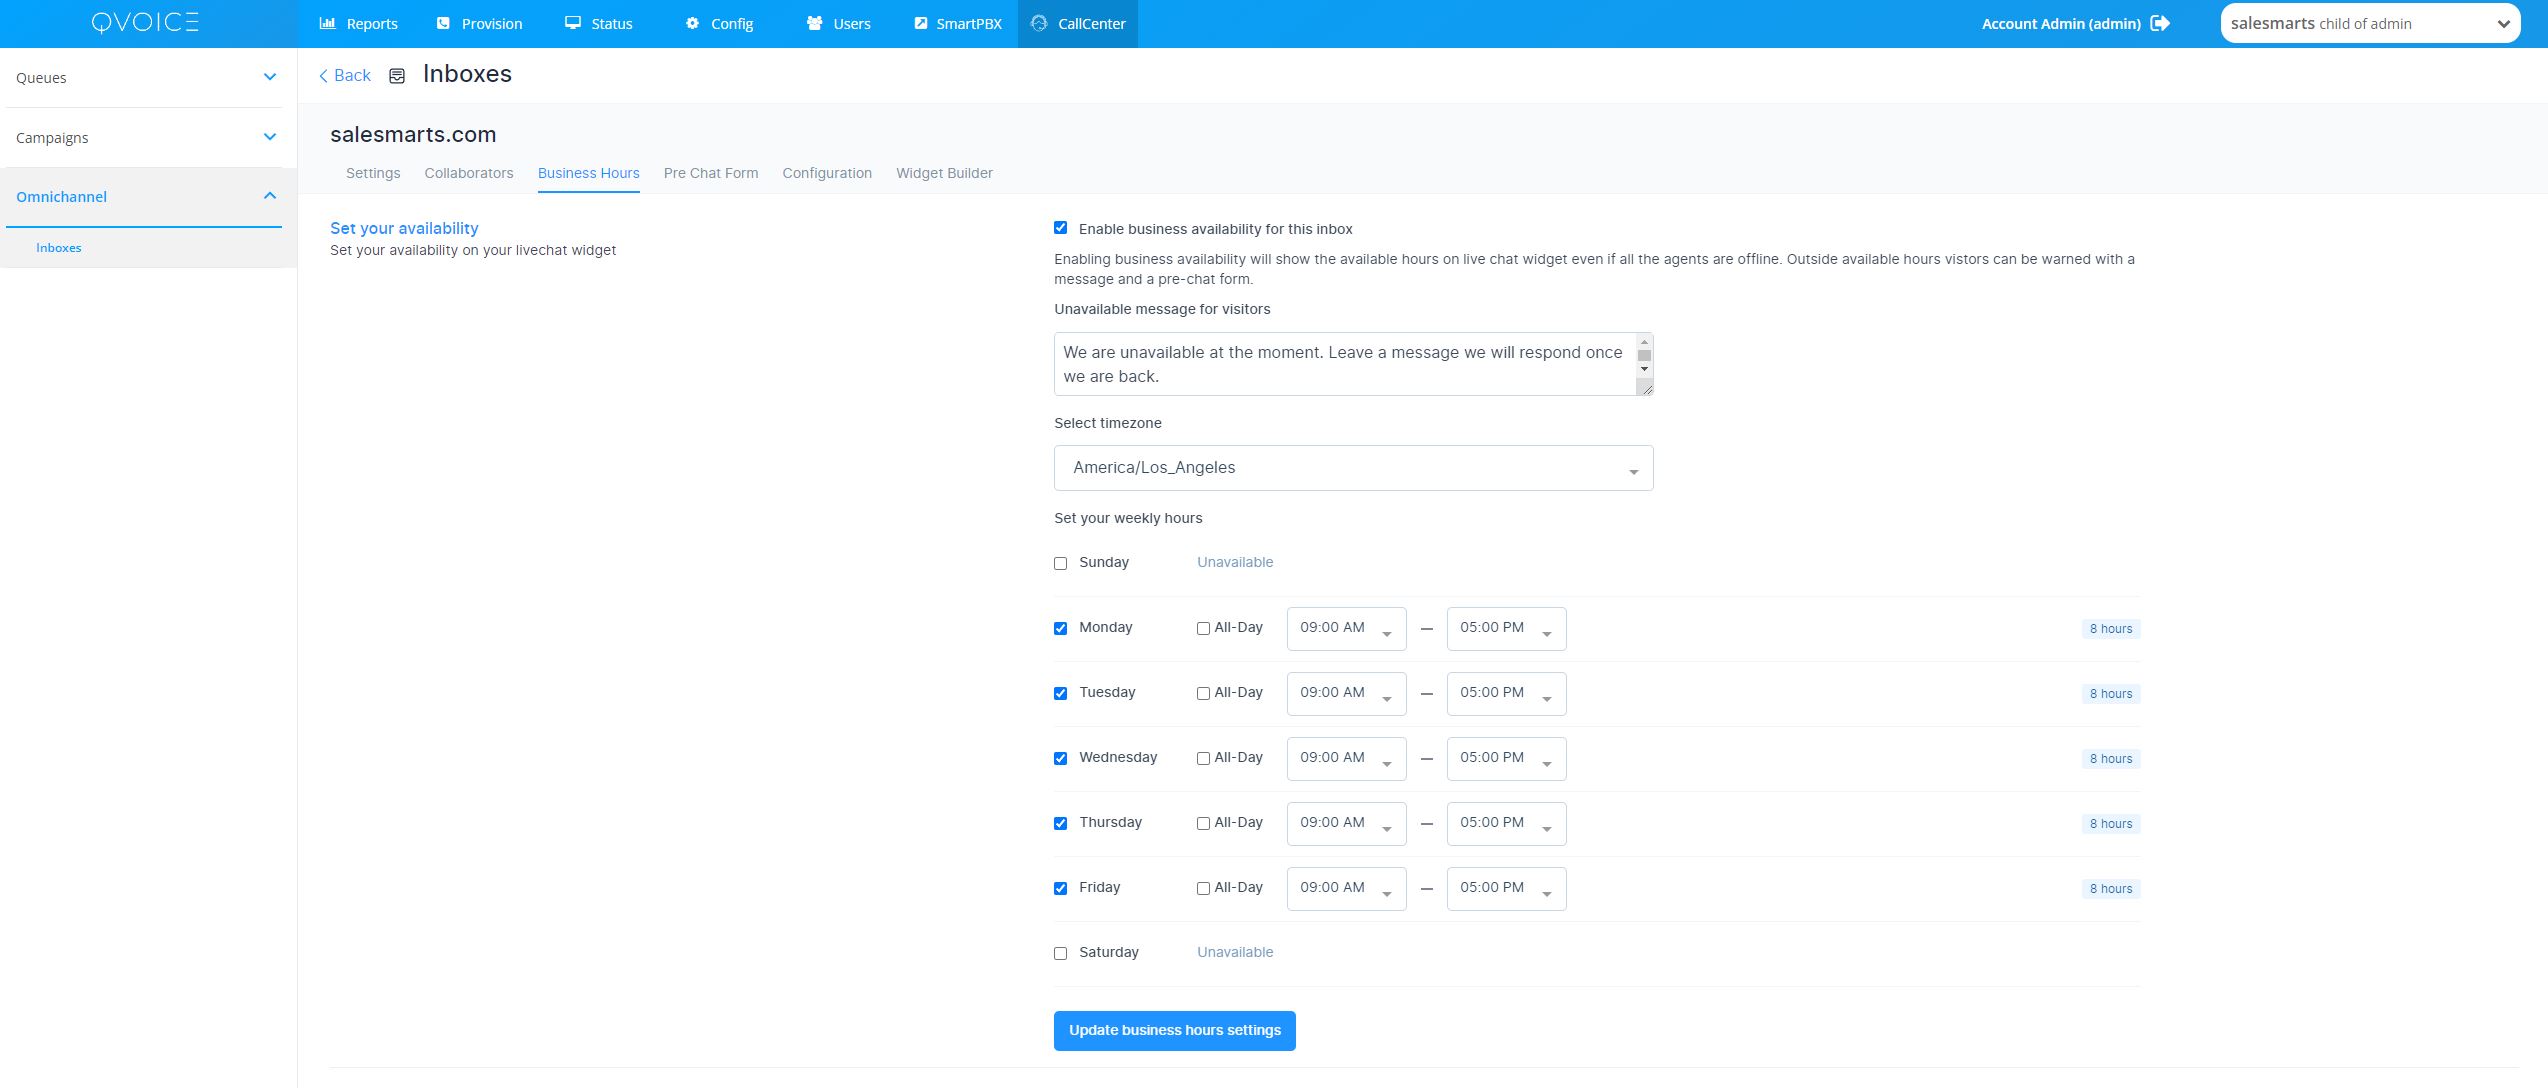
Click on the Business Hours tab. In this section, you can set the working hours of your team associated with the Twitter inbox.

Click on the check box for Enable business availability for this inbox if you have well-defined business hours.
Once the check box is ticked, the below section opens up. You can write your message to be displayed to the customer during OFF business hours.
You can also select the available business hours for each day of the week, along with the proper time zone.
Click on the Update Business Hour Setting Button.